DOM Manipulation for Web Developers
HTML defines the default DOM structure. However in many cases you may want to manipulate this with JavaScript, usually in order to add extra functionalities to a site.
DOM Manipulation is the process of changing the content and structure of the DOM (document object model). The DOM can be modified by adding, removing, or modifying elements and their attributes.
JavaScript DOM manipulation includes any of the following:
- Creating a new element
- Attaching/appending a new element to the DOM
- Removing an old element from the DOM
- Replacing an element with another element
- Changing the location of the element in the document
- Making changes in existing elements by adding style or by adding content
- Adding a new attribute to the element
- Removing an attribute from the element
- Changing the value of an attribute
- Changing the events on the DOM
querySelector()
The querySelector() method returns the first element that matches one or more CSS selectors. If no match is found, it returns null.
Before querySelector() was introduced, developers widely used the getElementById() method which fetches an element with a specified id value.
var ele = document.querySelector(selector);
selector– one or more CSS selectors, such as"#fooId",".fooClassName",".class1.class2", or".class1, .class2"
querySelectorAll()
Unlike querySelector() that returns only the first instance of all matching elements, querySelectorAll() returns all elements that match the specified CSS selector.
The matching elements are returned as a NodeList object that will be an empty object if no matching elements are found.
Syntax
var eles = document.querySelectorAll(selector);eles– ANodeListobject with all matching elements as property values. The object is empty if no matches are found.selector– one or more CSS selectors, such as"#fooId",".fooClassName",".class1.class2", or".class1, .class2"
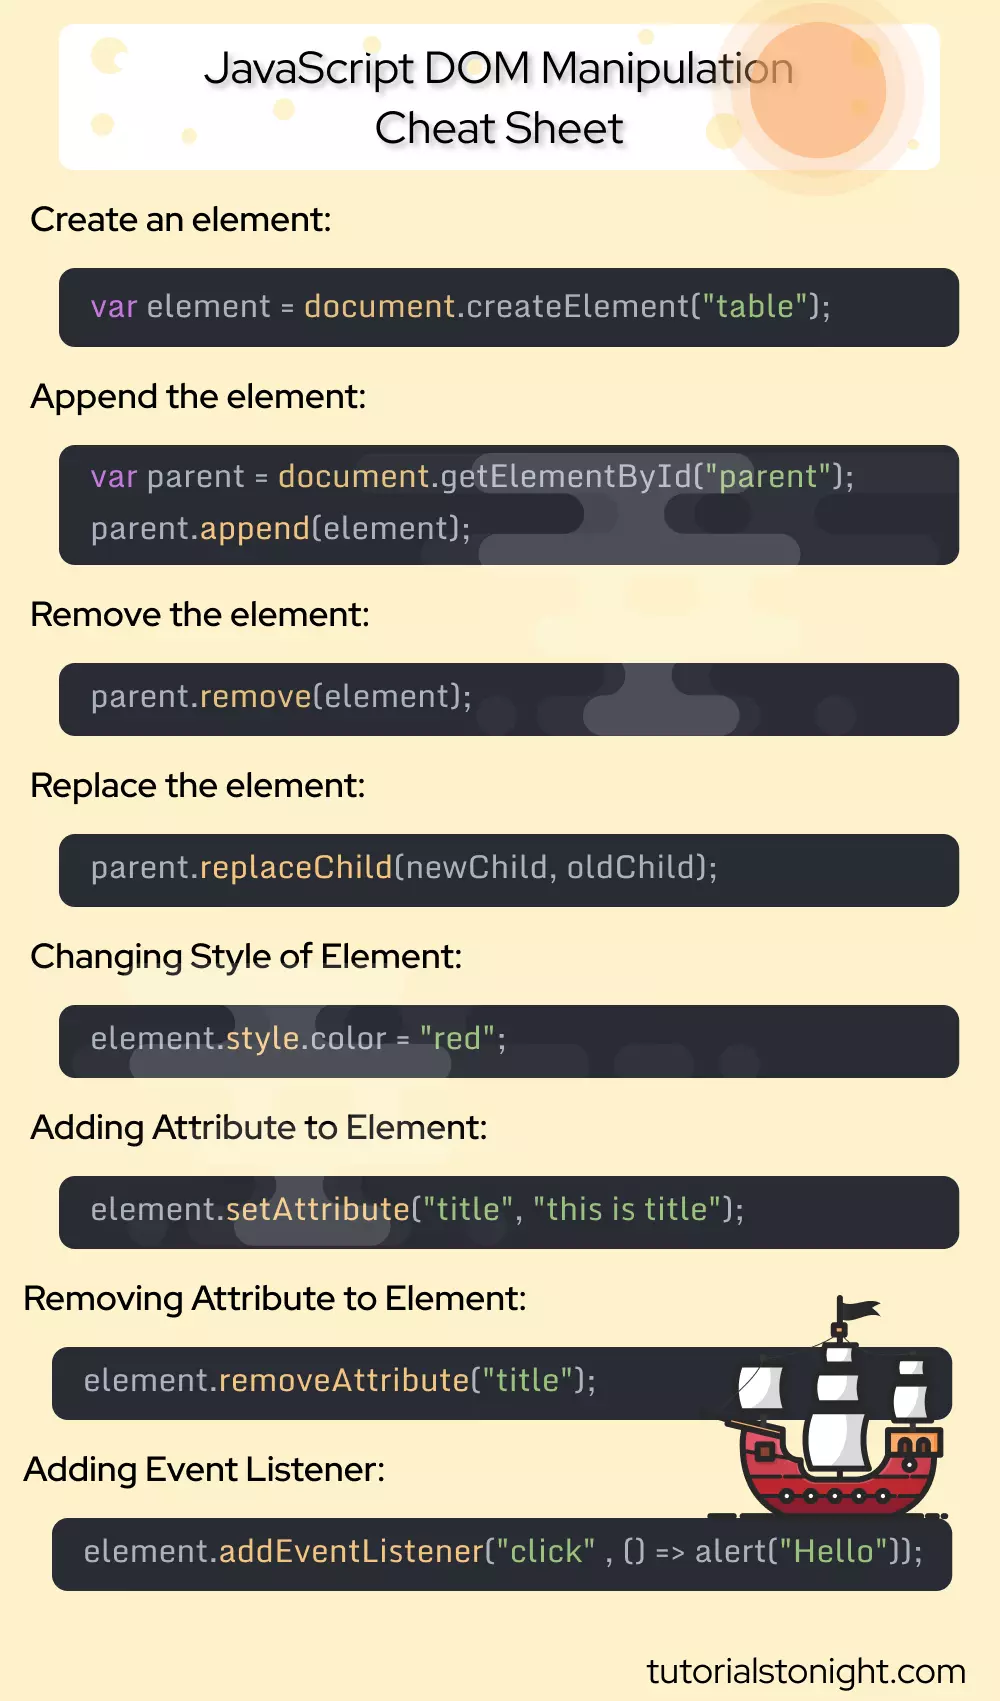
Create Element In JavaScript
To create a new element in the DOM, we need to use the document.createElement() method and pass the name of the element as an argument.
Example
Appending Element Using JavaScript
We have created the element and also has stored the reference of the element in a variable, but the created element is floating aimlessly because DOM does not know about the created element till now.
To make the created element a part of the document we have to explicitly attach it to the document using some methods.
- append() – It appends the Node objects or DOMString object to the parent element.
- appendChild() – It can append only Node objects to the parent element.
Example
The reference of Node element which has to be appended is passed as an argument to the method. The method calling element is known as the parent while the element which is appended is called the child.
Remove Element From DOM
The removeChild() method is used to remove the child element from the parent element. The reference of the child element is passed as an argument to the method.
Syntax:
- parentElement – The reference of the parent element.
- childElement – The reference of the child element.
Example
Note: You need to call the removeChild method from the parent of the child otherwise it will throw an error.
Replace Element With Other Element
The replaceChild() method is used to replace the child element with another element.
Syntax:
- parentElement – Parent element whose child is to be replaced.
- newChild – Element which will replace another one.
- oldChild – Element which will be replaced.
The method returns the element which is replaced.
Example
Changing Style of Element
You can also change the style of an element dynamically on an action. To change the style of an element you can use use the style property of the element.
With the style property, you can control any CSS property of the element like color, font, border, etc.
Syntax:
- element – The element whose style is to be changed.
- property – The property of the element whose value is to be changed.
- value – The value of the property.
Here is an example that changes the color of the element:
Example
Adding Attribute to Element
You can add an HTML attribute to an element using the setAttribute() method.
Syntax:
- element – The element whose attribute is to be added.
- attribute – The attribute of the element.
- value – The value of the attribute.
Here is an example that adds the attribute title to the element:
Example
Removing Attribute from Element
You can also remove attributes from an HTML element using the removeAttribute() method in JavaScript.
To remove an attribute call the method on the element and pass the attribute name as an argument.
Example
Adding Event Listener to Element
The addEventListener() method is used to add an event listener to an element.
An event listener is a function that is called when an event occurs on an element.
Syntax:
- element – The element on which the event is to be added.
- event – The event which is to be added.
- function – The function which is to be called when the event occurs.
Here is an example that adds mouseover event to the element:
Example
Javascript DOM Manipulation Cheat Sheet